What Stain to Use on Exterior Wood Door
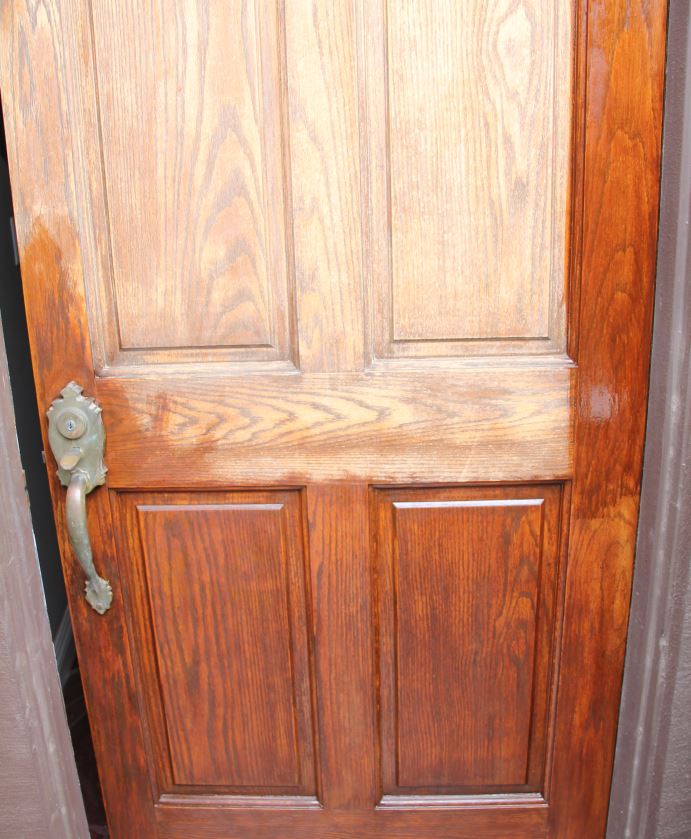
Subsequently years of sun and h2o damage (see above), my front end door was in demand of a re-stain and re-varnish. I decided to relieve some money and exercise it myself. Here's my story and some lessons that I learned.
Tools and Materials
Here is a list of things you'll need. I wish I had this list when I started because I concluded upward making three trips to the shop equally I discovered new things that I needed.
- Orbital paw sander and sandpaper OR chemical paint stripper
- Screwdriver
- Dropcloth
Whether y'all utilise a sander or a chemical pigment stripper, this will be a messy job! - Paintbrush
Get a decent i. If you lot get a cheap brush, you volition be picking bristles out of the stain and varnish – a huge pain! - Rag
- Stain
i/2 pint; y'all volition simply need half of information technology). Picking a color that is the same or slightly darker than the existing stain colour will make your life easier. If you pick a lighter stain, you volition accept to remove 100% of the existing varnish and stain (not piece of cake). Annotation, the Minwax stain I used was for indoor use. It turned out fine since I coated it with varnish, but yous might want to find a stain for outdoor use similar these:
- Varnish
1 quart; you lot will use less than 1/4 of it.) I recommend an oil-based outdoor varnish, especially if your door will be exposed to water. Oil-based varnishes are a fleck more than of a hassle to work with than water-based and tin can yellow over time, but they are more durable against the elements. (I used a water-based polyurethane with Satin finish.
- Wood filler.
I was forced to make an extra trip to the store to get forest filler when I discovered cracks during sanding. - Mineral spirits
Get if your stripper, stain, or varnish requires it for cleanup.
Disclosure: Some of the links on this page are affiliate links. This means if y'all click on the link and purchase the particular, I will receive an affiliate committee at no actress toll to you. I test or research each production or service before endorsing. This site is not owned past any retailer or manufacturer. I ain this site and the opinions expressed hither are mine. As an Amazon Associate, I earn from qualifying purchases.
Preparation
As is the example with painting, the vast majority of the work for this re-staining project is with the preparation, i.e., removing the old varnish and stain. Your patience will pay off! Don't blitz into staining too before the door is ready!
Start, remove as much hardware from the door as yous can. I personally decided Not to remove the door from its hinges because that seemed unnecessary and a huge pain. I recommend removing all other hardware from the door including the door know, the peephole viewer, and the bottom door sweep.
Adjacent, spread out your drib cloth then that information technology is nether the unabridged swing surface area of the door. Things will exist getting messy soon. As air blows into your home, it will blow sawdust inside, so you might want to comprehend your furniture equally well.
Patch whatever holes or cracks in the door with your wood filler.
Removing the existing varnish
This is the most important and difficult function of the whole chore.
I chose to remove the old varnish with an orbital hand sander. Another selection would exist to utilize a chemical stripper. If you go that route, I would recommend a non-toxic citrus-based one (I have used those before and they piece of work and actually smell good!)
If yous are going with a lighter stain color, a stripper might be the only way to get. It is very difficult to remove all of the varnish in corners and crevices with sandpaper.
Using a chemical stripper is very messy though. With the door still on the hinges, the stripper and liquefied varnish will baste downwardly and make a mess that you will be walking around in. I did not desire to track that into my home. Then, I opted for sanding, since I was going with a darker stain color.
I experimented with different grit sandpaper until I found one that seemed to get the job washed (it was surprisingly rough). I was also surprised at how much sanding information technology took to cutting through the varnish, fifty-fifty with the orbital sander.
It turns out that I didn't have the sandpaper taught enough against the sander, which fabricated information technology not as effective. I assumed that the pre-cut sandpaper that came with the sander was the right size, but really, they were a little too large and had slack. The vibrating sander wasn't moving the sandpaper very efficiently, as a result. But later on a couple hours of sanding did I realize this and trim the sandpaper, with much improved results.
The important affair is to remove all of the varnish in the large flat areas. If at that place is some in the corners and crevices, that is OK if you are going with a like stain colour.
In retrospect, I didn't practise a great job of removing all of the varnish, even in the large apartment areas. I got lazy and tired of sanding. The but thing that saved me was that my new stain color was darker than my old one, so I was able to cover up the "splotches" with extra stain.
So be sure to remove absolutely 100% of the old varnish from the large apartment areas of your door!! Information technology's OK to leave some of the old varnish in those difficult-to-attain corners and crevices.
When I was washed sanding, I vacuumed the door to remove the sawdust, then used mineral spirits and a rag to clean it.
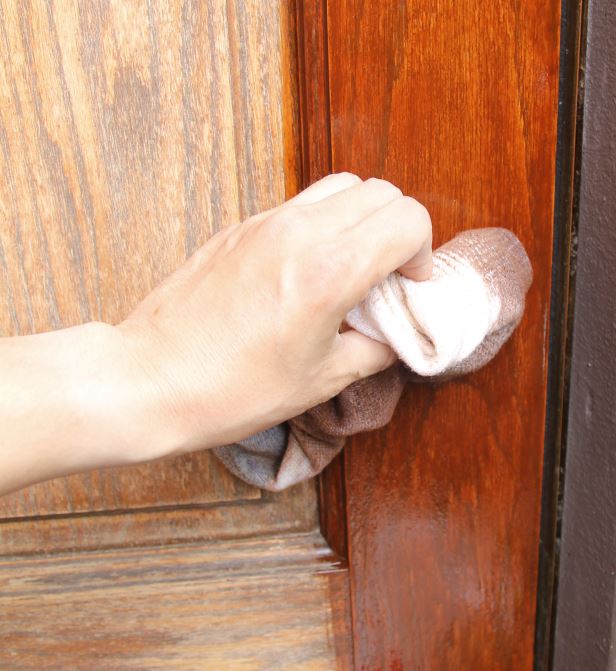
The Staining
OK, now to the piece of cake part – the actual staining! The key part of staining is to wipe off the excess after you apply it. Stain a section, and so wipe. The longer you let the stain soak, the darker it will be. Apply the stain to a panel, let it sit for a bit, then wipe information technology off with a rag. You do not want a heavy coat of stain.
This is where my previous so-and so sanding chore came back to haunt me. There were some splotches of lighter areas where some varnish remained. I was able to hide these by applying more than stain in those areas, but I recommend doing it correct and doing a better sanding job than I did!
The Varnish
Later the stain dries (I let it dry for 2 days only to be sure), you'll be ready to employ the varnish. I purchased a water-based urethane designed for outdoor use (Minwax Urethane).
The instructions said that this varnish required a whopping three coats, and iv was recommended for outdoor surfaces! In addition, they recommend re-applying every year!
I discovered that it was because I used water-based varnish. For almost folks, I would recommend an oil-based varnish, which would be more durable, but tin can look slightly yellowish.
For me in Los Angeles, my water-based varnish will exist ok, but for places with more rain, I'd recommend an oil-based varnish.
Sand the door lightly with fine-grit sandpaper. It'south kind of scary because it looks similar y'all're ruining the finish, but it volition exist fine. Wipe off the dust with a damp rag.
Apply a thin glaze of varnish. Be sure to look at your door carefully at different angles confronting the light to check for drips, brush beard, missed areas, etc.
The varnish I used dried surprisingly speedily, in just a few hours. Sand, wipe with a damp material, and re-apply as directed in the instructions!
Keep the remaining varnish so you tin can apply a new coat as the finish wears.
The Last Product
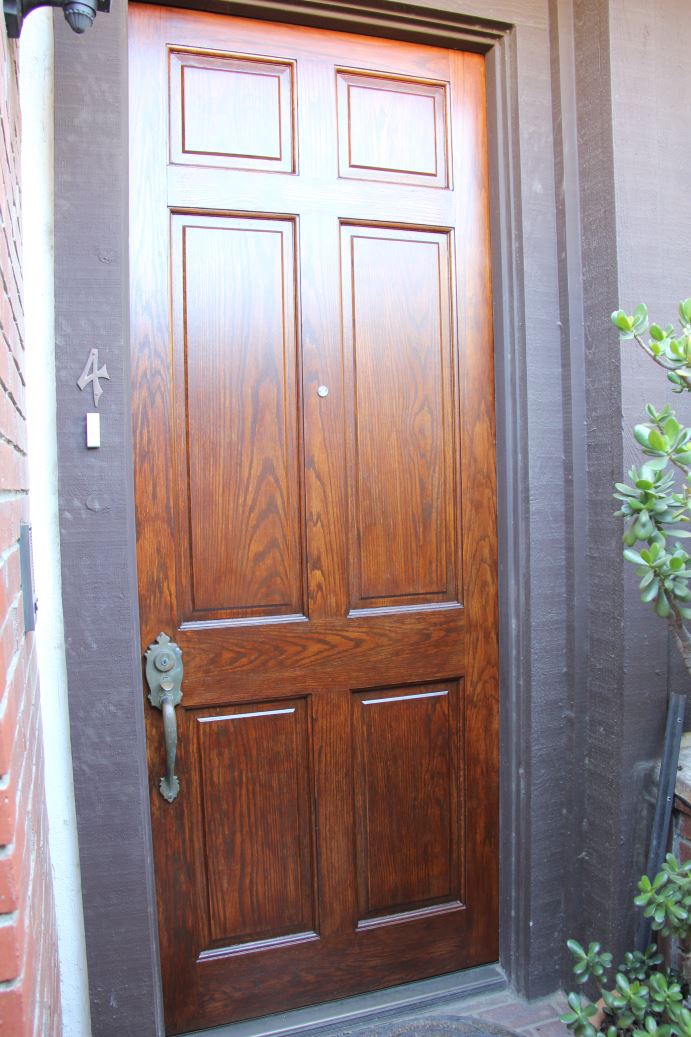
Your door is now done! Mine withal has some spots of old varnish on there, only no 1 has noticed them besides me, and the end upshot is pretty boot-ass. I saved most $200 by doing information technology myself (and I put on more than coats of varnish than a hired manus would accept done).
Re-Appplication: A Fact of Life
After a little over three years, I noticed that the lesser of my door was showing signs of wear from the weather (mainly from rain, not sun). Some of the varnish was coming off, leaving the stain exposed. The characterization for the Minwax varnish I used recommends re-application every year, so information technology went way longer than claimed.
So, I did a modest impact up past re-sanding the door, applying the stain where needed, so applying new coats of varnish. This is a lot less work than staining the door originally, so it wasn't too bad. At the cease of the re-application, my door was as good as new!
With water-based varnishes, re-awarding on outdoor surfaces is a fact of life. An oil-based varnish will final longer. In either case, save your stain and varnish. I recommend labeling them so yous know which ones you used for your door.
Adept luck with your projection! Let me know how it went in the comments! – Brian
Continue in bear upon!
Source: https://www.thefrugalnoodle.com/re-stain-front-door/
0 Response to "What Stain to Use on Exterior Wood Door"
Publicar un comentario